


For our shoe pattern, we start with a likely-looking 13th/14th century turnshoe as featured in Marquita Volken’s Archaeological Footwear. The image shows both the reconstructed shoe as well as the approximate pattern (top right)

Draw the center line if it isn’t already there (and it should be).

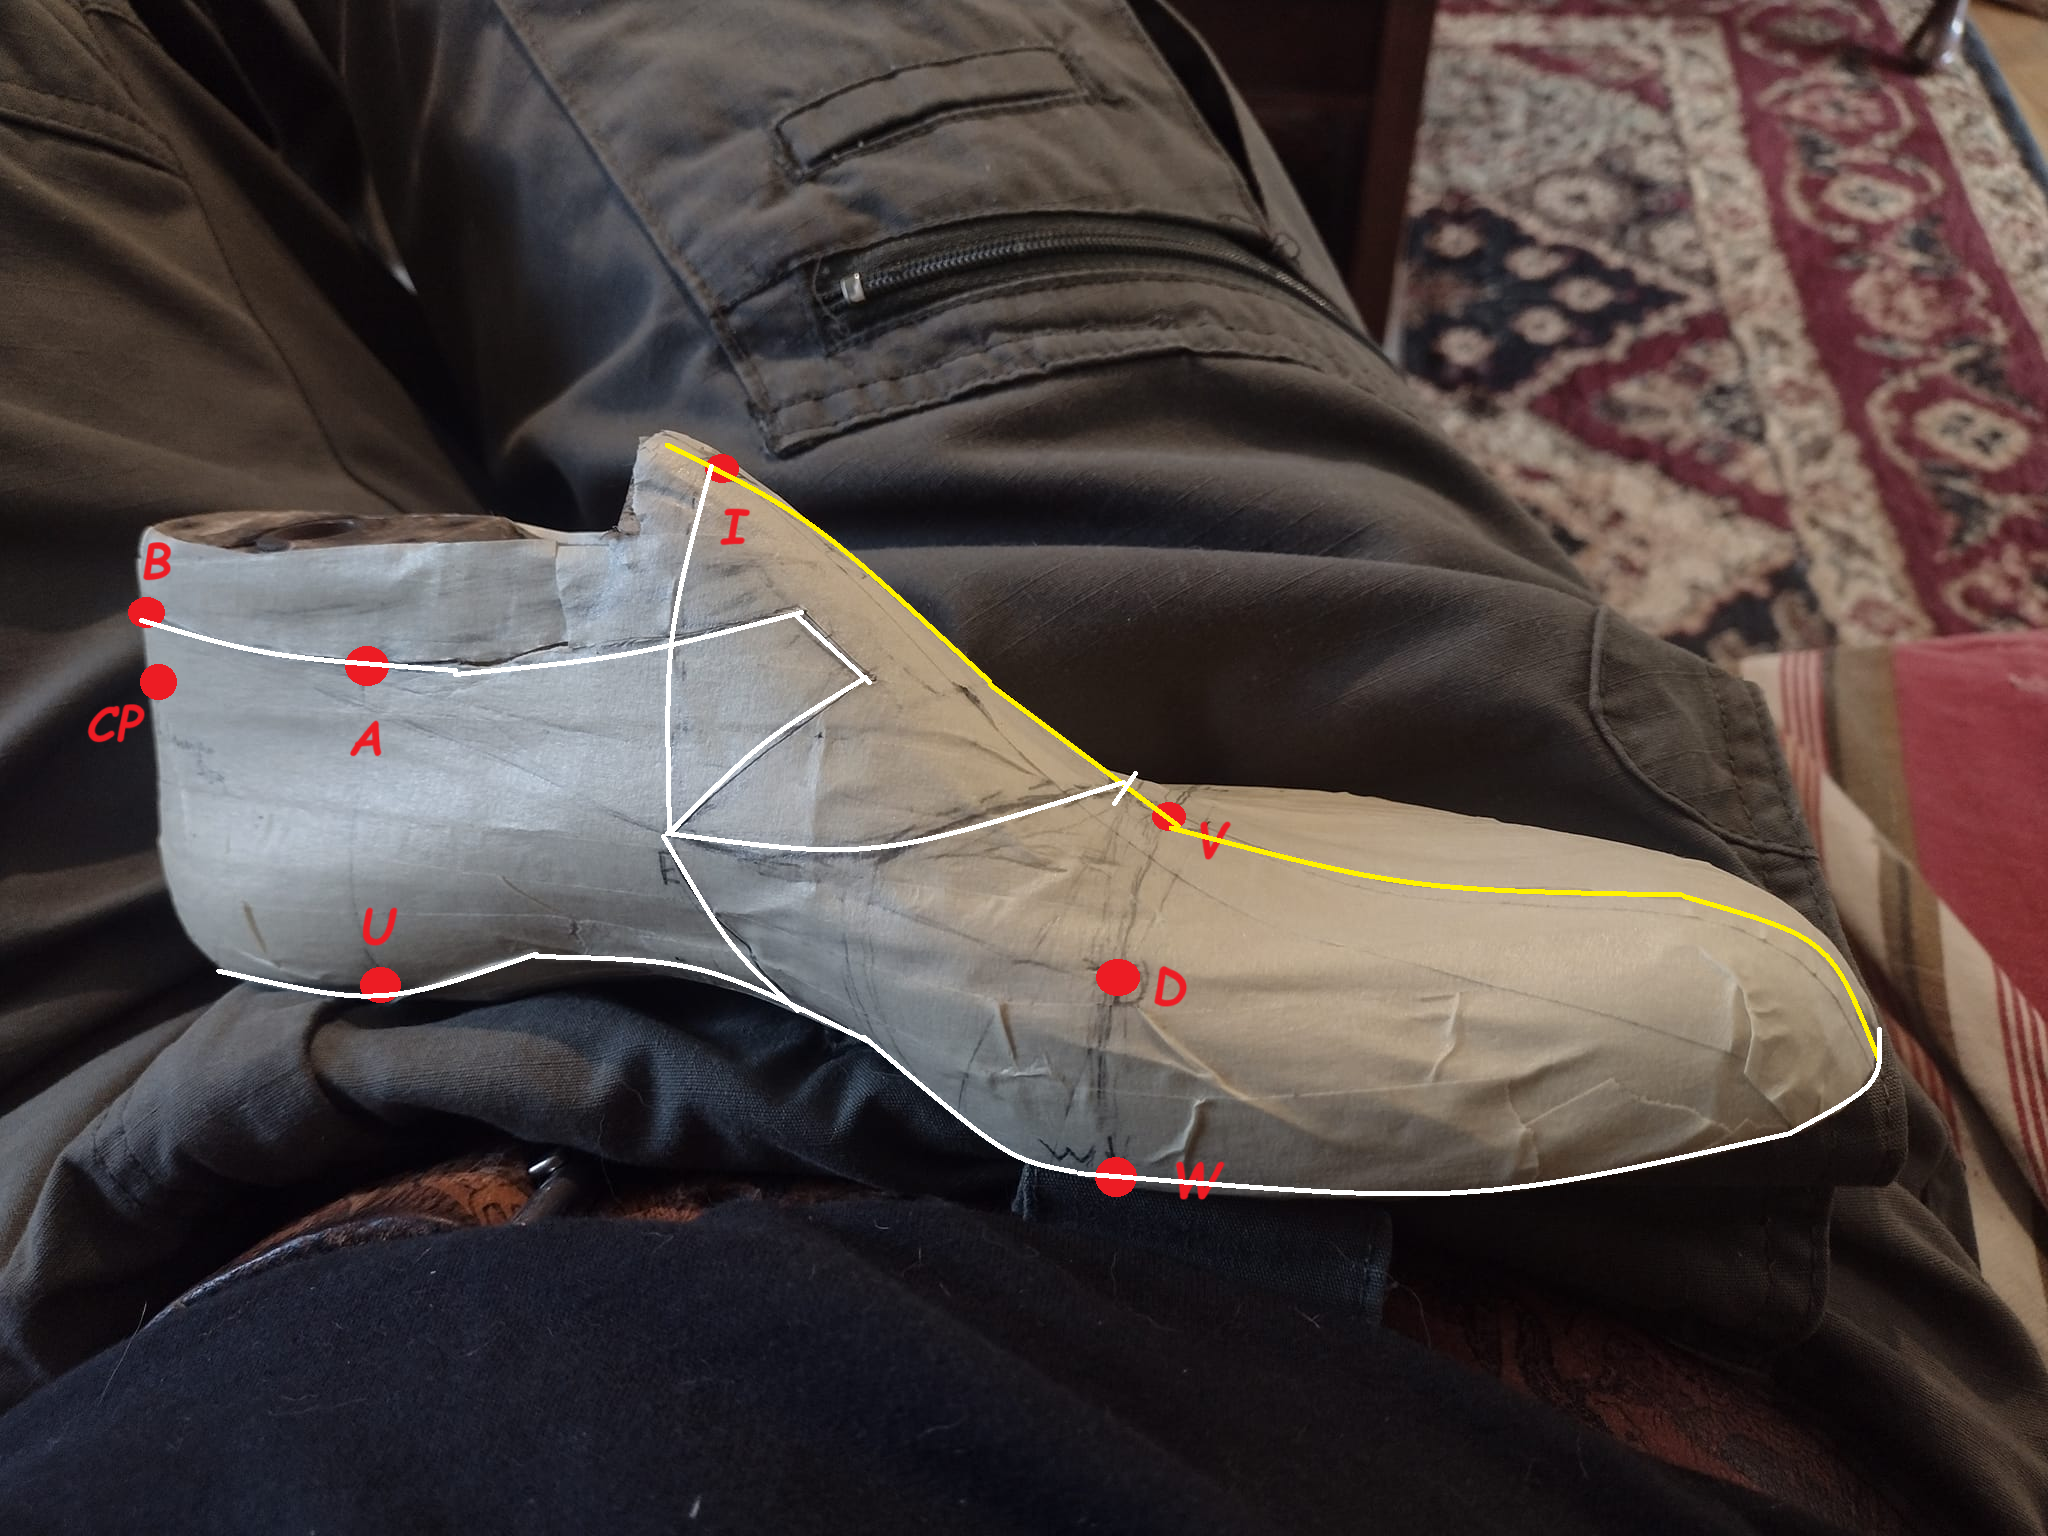
Time to see where the top strap’s line should go. Looking at the pattern in the book, it’s clear that the top strap doesn’t meet at the center line, but stops part of the way. Point D is a useful reference point, so draw a line from the top-most part of the shoe (point I) to point D. Repeat on the other side.

Consulting the pattern, we see that the shoe has a seam running along the inside of the shoe down to the sole. Conveniently, we already have a line for that, so we just trace that in along the line from I to B-D to the floor. Do NOT repeat on the other side, as this shoe has just one seam!
The completed pattern! All we have to do now is cut it off the last (and also create a pattern for the tongue out of the off-cuts, if we desire),

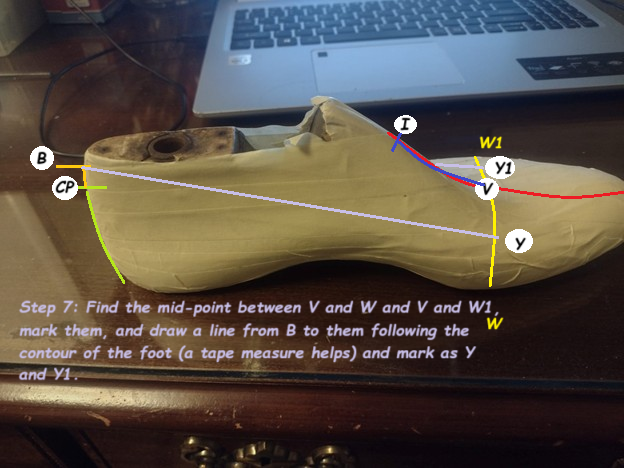
Draw a line from the backstrap (point B) to points D and D1. Note: in an original version of this post I labeled the half-way points between V -W and V -W1 as Y and Y1. In this sequence, I renamed the points D and D1.

We know that point A is the top-most point where the top of the shoe should rest under the ankle bone. To determine the top-line of the shoe, we draw a gentle curve from B to A, and then through A in a gentle curve up to line I-D (omitted for clarity here). Again, we use the book’s drawing for inspiration and rough outlines. Repeat on the other side.

At this point, not much remains. We take stock of the line I-D and mark the line about an inch long to serve as the side of the top strap. Repeat on the other side.

We already know point I is the highest point of the shoe, so draw a line from I to a point along the B-D and B-D1 line

We need to determine how wide the shoe’s front opening should be. So we continue the line we started earlier at I, down through the B-D line, and down to the floor in a straight line (it looks curved because the shoe’s instep is curved). Repeat on the other side.

Seen here with the line omitted for clarity.

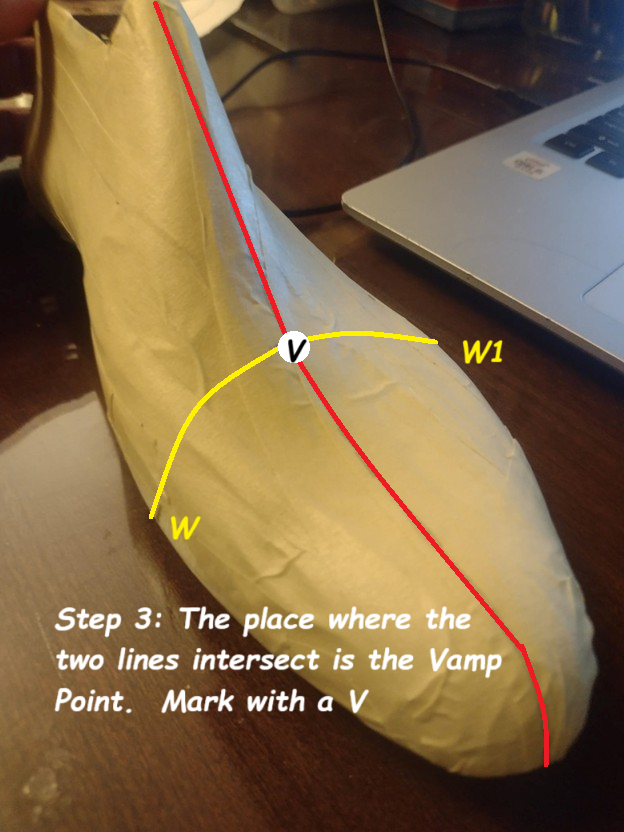
We already have the vamp point at point V, so we know that’s right around where the front opening should end. Go up from V about 1/2” and mark a line. That is where the front opening will end.

From our center point we drew earlier up from V, we extend a gentle curve to the point where point I intersects with line B-D. Repeat on the other side.

Lastly, we draw a gentle curve along the underside of the top strap to complete the pattern, consulting the diagram from the book. Repeat on the other side.